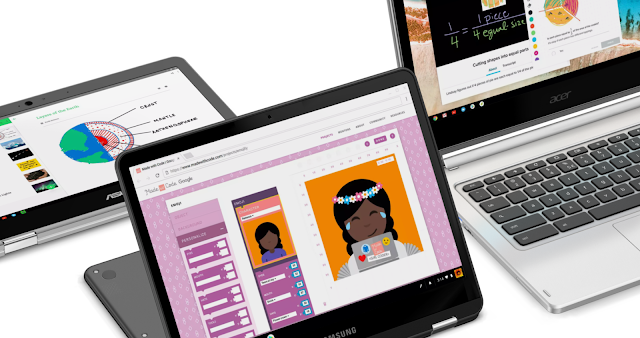
Quizlet Diagrams and Quizlet Learn - Something New to Explore

Quizlet has always been a great tool for vocabulary. I've always shared my vocabulary lists for my Environmental Science through Quizlet. 

Last year I fell in love with using Quizlet live with my students. I've written a few posts connected this wonderful collaborative tool for formative assessments. (Search Quizlet in the search box to explore my past Quizlet Posts.)

The most recent updates to Quizlet are now available for teachers and students. Check out Quizlet Diagrams and Quizlet Learn

"See what you're learning in a whole new way." - Quizlet Diagrams


"See how you're improving, get gentle reminders to study, and make progress with short, actionable study sessions." - Quizlet Learn


I am using Quizlet Diagrams with my students to explore Biogeochemical Cycles this week. You can explore some of the diagrams already be created by students and teachers here

How will you use Quizlet Learn or Quizlet Diagrams with your students?


Calendar Templates Using Google Docs

I am a huge fan of Google Calendars and the Google Classroom Calendars, but I occasionally have an educator ask me about creating a printable calendar using Google Docs. (They could always do this with Microsoft Word.)  Once upon a time, there were calendar templates in the Old Google Docs Templates, but I have not found one in the New Docs Templates. (Maybe by the time some reads this, there will be and you can ignore the rest of this post?)

I have even gone as far as manually creating a template in a Google Document. I used tables and entered the dates manually and shared this with staff/students as a template preview. You can learn how to share Google Files as copies or templates in this post if you are not using Google Classroom with students or as a PD tool.

"By three methods we may learn wisdom: First, by reflection, which is noblest; Second, by imitation, which is easiest; and third by experience, which is the bitterest." Confucius

I continued to explore this topic here and there and my wisdom has grown. Currently, I recommend 2 different options to staff looking for a calendar in Docs. I will provide additional details below if you are interested in exploring 1 or both of these options. 
  • Option 1: Use Google Sheets Templates (There is a nice calendar template in the New Sheets Page.)
  • Option 2: Create a calendar using a Microsoft Word Calendar Template and upload to Google Drive as a Google Document. 
Google Sheets Calendar Templates

You can find a calendar template on the New Google Sheets Template Page.

Here is a copy I made from the template gallery if you want to see what this would look like. (The Tabs on the bottom open up each month.)

If you are looking for a few more template options, you might explore the Add-on “Template Gallery” by Vertex42.com (I’ve not used this, but it looks like there are several calendar options. A template could be created by a teacher and then shared with students.


Microsoft Word Calendar Templates to Google Docs


When creating a new Word Document you have the option to start from a template. The process varies slightly depending on the version of Word you are using. Click here to see the process in Word 2013.

After creating your template in Word, you can upload and convert your file to Google Docs. You may need to make a few formatting changes, but you now have a shareable template. Share in Google Classroom or use these tips to share the url as a copy or a template. 


Getting to Know My Students - The Learning Continues

I started the year with a series of activities designed to build a stronger classroom community.


I have continued to get to know my students and I just wanted to share a followup activity that we really enjoyed.

I will typically share a short video that I find inspirational, motivational, or sometimes just fun on Fridays. The goal is to get conversations started about something that is more than just our content.

Today I showed the James Veitch TED Talk - The agony of trying to unsubscribe 


I am still adapting to the personalities of my classes, so I was not sure where our conversations would go. It went much further than I could have already hoped. Long story short, we had an incredible conversation about boredom and learning that I did not know that my students had in them. 

I wanted to share this video today in case you are looking to have a creative conversation with your students on Monday? If you share this video with your students, I'd love to know how it goes. 

"Let it be the catalyst for whimsy!"


What is Your One Small Thing? - Join the Movement

If you decide to join the #OneSmallThing Movement, please share your graphic with me. I promise to retweet each one shared with me. (@WickedEdTech)
I stumbled on this wonderful idea today from the #OneSmallThing Blog
#OneSmallThing is based on the simple idea that a BIG impact comes from focusing on one small change at a time
So simple, but so powerful. I immediately began to brainstorm ideas for my #OneSmallThing. I decided that taking at least one moment a day to find something that makes me smile would be my #OneSmallThing. I hope this is more than a selfish goal and it leads me to be a better person and educator.
The site has a quick interface to create a graphic and here is my first attempt at a small thing graphic.

Here are a few more that I loved on Twitter and I would love for you to share yours with me. I promise to retweet everyone. (@WickedEdTech)


What will be your #OneSmallThing this year?

Pocket Chrome App and Extensions - Organizing and Curating Your Digital Life

I am always looking for new ways to explore and curate new ideas and resources. Pocket is one of my favorite resources to support my learning habits. I love that pocket works across multiple devices. This means that I can save something to Pocket in my Chrome Browser and later read it offline on my iPad or iPhone.

The Save to Pocket Chrome Extension allows me to quickly capture and label web content in my Chrome Browser. 
  • One-click saving of any page with the toolbar button or keyboard shortcut
  • Right-click menu item to save any link, no need to load the page first
  • Quickly add tags 
  • See related recommendations when you save to Pocket
The Pocket Chrome App allows me to quickly organize and share resources I've saved to Pocket.
  • WHAT CAN I SAVE?
    Save articles, videos, recipes, and webpages you find online or from your favorite apps. 
  • VIEW EVERYWHERE, EVEN OFFLINE
    If it’s in Pocket, it’s on your phone, tablet or computer, even when you’re offline. Perfect for commutes, travel, and curling up on your couch. 
  • BETTER VIEWING EXPERIENCE
    See your saved items in a simple, easy-to-view layout that improves the viewing experience of any page. 
  • WORKS OFFLINE
    Access what you’ve saved offline. Set up Pocket to only download when connected to Wi-Fi to reduce data usage.
The Pocket New Tab Chrome Extension brings some of the best of the web to my new tab pages in Chrome.
  • Discover top content from across the web on your new tab.
  • New content gets added every hour, so you never run out of interesting things to read.
  • Seamlessly save interesting content to your Pocket, read across devices, even offline.
  • Keep up on popular topics of the day, and dig deeper with direct links to Pocket Explore.
Learn more about Pocket for Android, iOS, or on the Web.


Google Drive Add-ons for Teaching and Learning


Learn to add more functionality to your documents, spreadsheets, and forms by installing add-ons, tools built by third-party developers for Google Docs, Forms, and Sheets. Once add-ons are installed, you can manage each one individually, and turn them on and off at any time. This tutorial will guide you through the basics of installing and managing Google Drive Add-ons.
Recommended Add-ons

Google Drive Add-ons Tutorial
Find and Install add-ons
1. Open a document, a spreadsheet (using the new Sheets), or a form. Each will have different Add-ons specific to the tool.
2. Click the Add-ons menu and then Get add-ons. You will only see Add-ons connected to the drive resource you are using.


3. You can browse the entire Add-ons store, or a particular category using the dropdown menu in the top-left corner. Hover over an add-on to see a short description or to quickly install it. You can also search Add-ons. To see a full description with ratings and user reviews, click the add-on.


4. Click to install the add-on.


5. For most add-ons, a message will appear requesting access to specific data that the add-on needs to work. Read this message carefully and click Accept.
6. Once the add-on is installed, it’ll be listed in the “Add-ons” menu within all of your files of that file type. You can turn on the add-on in any of these files and other people collaborating on the file will be able to see and use the add-on as well.


Managing Your add-ons

Add-ons are tools built by third-party developers that you can apply to add new features to Google Docs, Google Forms, and the new version of Sheets. Once you install an add-on, you can choose how you want to use it, including turning it on or off for specific files.

To turn on add-ons for a specific file you are working on, or to turn them off:
1. Open a document, spreadsheet (using the new Sheets), or form.
2. Click the Add-ons menu.
3. Click Manage add-ons.
4. From the list of add-ons, select the one you want to use.
5. Click Manage.


6. Click Use in this document. A checkmark will appear next to this option when the add-on has been turned on. To turn off the add-on for that file, click the option again.

Uninstall an add-on from all of your files


1. Open a document, spreadsheet (using the new Sheets), or form.
2. Click the Add-ons menu.
3. Click Manage add-ons.
4. From the list of add-ons, select the one you want to use.
5. Click Manage.


6. Select Remove.


Additional Resources


Getting to Know My Students - Opening Activities Enhanced with EdTech


Can you remember who you were, before the world told you who you should be?” ― Charles Bukowski


We are back! It is awesome to see students again!

A week before school started, I discovered an Edutopia article about community building in the classroom. 

Relationships Matter More Than Rules - Community building in the classroom starts on day one. Try these strategies to begin forging strong relationships.
This article inspired me to rethink how I start the year, so last week I welcomed my students to the 2017 - 18 School year with a collection of activities that I hope will help us build a more powerful learning community. Here are a few reflections on my first week of getting to know my students.

Day 1: Notecards, Seating Charts, and Riddles


Students chose their own seats as they walked in the room.
I enjoyed this more than telling them where to sit. It was also good to observe who chose which locations and which groups. It is taking me a bit longer to learn some names without the alphabetical order I've used in the past. I plan to use quizlet.live a few times to get them collaborating and communicating with random groups.

Each student received a notecard and I asked them to respond to the question, "What do I need to know?"
I was purposefully vague, to get them thinking. Maybe I was a bit too vague because the students were all over the place. Some talked about themselves, some talked about me, and some added some randomness to my reading. There were even quite a few who did not include their names. I initially felt this was a failure, but I was able to adjust and follow up with an activity on day 2.


Reboot the Noggin Episode 1 - Critical Thinking and Collaboration Activity
Instead of jumping into content or classroom stuff, I decided to start the year with this activity. It took a bit to get the students collaborating and it was more difficult as the groups got bigger. We had a great discussion about engagement in larger groups. I am hoping we can build on this for future whole class collaboration. 

Day 2: Questions to Start the School Year, Communication Resources, and YouVideo Project

Questions to start the school year
We started our day having a conversation about the note cards not telling me much of what I needed to know. We had fun with some of the note card comments from day 1. (All names were changed to protect the innocent.) Inspired by Tom Murray's post, I followed up the note card activity with a Google Form asking more specific questions. I think our fail forward discussion about the day 1 note cards inspired my students. I received some of the best responses ever to the questions in a getting to know you survey

Sharing who you are with Flipgrid video responses
I've done something similar before, but I updated our YouVideo activity to engage students in some digital communication. I really enjoyed the creative use of props this year and I am looking forward to having my students figure out what the props tell us about each student. Students will be partnered with a Give 1 Get 1 Activity that asked them to talk to someone they don't know well and share something important to them. I will assign students groups based on the Give 1 Get 1 Activity and they will respond to the YouVideo Flipgrids with their video responses. 

Digital communication resources
Updated some of our digital engagement communication resources. Looking forward to expanding our use of these resources throughout the year.

Day 3: This is Water Video and Classroom Norms

Perspective and Empathy
Watched "This is Water" and discussed empathy and perspective. Students engaged in the video, but I  had to work really hard to get the discussion going. Maybe it was a Monday thing? I still have some work to do to get students taking ownership of the conversation. I am hoping our 1st HyperDoc will continue to support the process of shifting their mindset from teacher-let to student-owned. 

Classroom norms discussion and Padlet
Students participated in a think-pair-share to get the discussion started about how we can maintain a culture of learning. I followed up with this slide deck based on the discussions and asked them to share what was missing in a classroom Padlet. 

Day 4: Attendance Questions

Getting to know names and personalities with attendance questions.
A posted a quick question on the board and we went around the room with every student giving a short response. I went traditional teacher and asked them a classic question, "What is one thing that will stick to your 2017 summer memories?". I plan on using these attendance questions on Tuesdays and Thursdays to continue building our learning community. 

The Future
We will continue to build on these activities as we move forward as a community of learners. Up next will be a student-centered HyperDoc to get them adjusted to a more learner-centered classroom. 

What are your favorite activities to get to know your students?


Some of Our Favorite Chromebook Keyboard Shortcuts

Essential Keyboard Shortcuts


Chromebook keyboard shortcuts are combinations of keys and clicks that can be used to perform specific actions, such as taking a screenshot. Knowing some of the shortcuts listed below can help enhance the efficiency of a Chromebook.


If you are using a Chromebook you can also press ctrl+alt+? to see a map of these shortcuts directly on the screen.


Explore These Keyboard Shortcuts
Caps lock (On / Off)
alt +
Change screen resolution
ctrl + shift and + or -
Reset to default
ctrl + shift + 0 (zero)
Copy highlighted text
ctrl + c
Cut highlighted text
ctrl + x
Delete
alt + backspace
File manager
alt + shft + m
Lock screen
ctrl + shift + l
Log off
ctrl + shift + q
Paste
ctrl + v
Screenshot full page*
ctrl +
Screenshot selected area*
ctrl +shift +
Then click and drag area to be copied.
Undo
ctrl + z
Redo
ctrl + shift +z
Reopen Browser Tabs
ctrl +shift + t

Task Manager
+ escape


*Screenshots are automatically saved in the File Manager of the Chromebook


More Keyboard Shortcuts


Top Posts