The last Curiosity Question had some great responses.
If you had the power to change one single thing about yourself today, what would you change? Why?
This week's question following a similar path. I borrowed this question from Christine Borst's response to a #creativites question. I think this is a really tough one, but I think we all have a moment in time that we wish we would have done differently? Hindsight is always 20/20 right?
What is one thing from your past that you wish you could go back and change? Is there a moment in your life that you wish you had done differently? Why?
Thanks Kim and Christine for the inspiration!
Please share your answer and your why in the comments below or using the Hashtag #CuriosityQs. Each Thursday, I will share a new question that I hope will inspire you to share your thoughts and maybe explore something new.
If you have a great question that I can ask, please DM me on Twitter. Full credit will be given for all questions that I share that are not my own.
If you don't know why you are doing something connected to teaching and learning, why are you still doing it? Join us as we explore resources to help educators and students grow as leaners. #LifelongLearning #BetterTogether #HappyLearning #AlwaysLearning
Tuesday Tip - Customize Your Google Forms
Google recently announced an update to forms.


Google says this was a top request from users, but I've always been surprised by how many users don't know about or use the "Customize Theme" menu. Most forms I've completed are the default purple. There is nothing wrong with this, but sometimes it is nice to see a theme that connects to the questions, the content or is branded for a school.
If you are curious about how to take this default purple . . .

and quickly transform it to this? (Maybe match your school colors?)

or even this? (Connect the theme to the content? Maybe a book reflection or reading quiz?)

Then here is a quick overview of how to access and change a form's theme.
1. Open a New Form or an Existing Form in Google Drive or in the Google Forms Home Screen. (Themes only modify the visual aspects of an existing form. It will not change the existing the existing questions or modify the order. .)
2. Click on the Color Palette Button. and a "THEME OPTIONS" sidebar will now open with all of your theme options.

3. "HEADER" allows you to choose a header for the top of the form. This will also impact the background color of the body of the form. There are quite a few choices and you can even upload your own image to use as the header.

4. "THEME COLOR" allows you to change the colors on the form. If you add a header, the "THEME COLOR" choices will change to match the header.
5. "BACKGROUND COLOR" allows you to change the background shading of the "THEME COLOR".
6. Right now there are 4 font styles and these impact the entire form. (Right now it is not possible to just change the font on individual parts of the form. Maybe a future update?)
7. Click on the X to close the sidebar. You can open this and make changes at any time.
The built-in G Suite Training also has a quick video that can help you learn about themes in forms.

Looking for more EdTech and Google Tips? Explore the Archive of Past Tuesday Tips.
Digital Resources to Support Science Educators and Students
"Science is fun. Science is curiosity. We all have natural curiosity. Science is a process of investigating. It's posing questions and coming up with a method. It's delving in."
Sally Ride
We are working on updating our web resources for different subject areas. This week the focus is connected to Chrome and G Suite Resources for K-12 Science teachers and students. This is the working document:
If you have suggested resources or ideas can you share them with us?
- Add a comment to the Science Resource Document.
- Or post in this Collaborative Padlet.
- Or add a comment at the end of this post.

Curiosity Question of the Week - What Would You Change About Yourself?
The last Curiosity Question had some great responses.
This week's question is all about a little self-reflection.
Please share your answer and your why in the comments below or using the Hashtag #CuriosityQs. Each Thursday, I will share a new question that I hope will inspire you to share your thoughts and maybe explore something new.
If you have a great question that I can ask, please DM me on Twitter. Full credit will be given for all questions that I share that are not my own.
What is your favorite movie of all time? Why?
This week's question is all about a little self-reflection.
If you had the power to change one single thing about yourself today, what would you change? Why?
Please share your answer and your why in the comments below or using the Hashtag #CuriosityQs. Each Thursday, I will share a new question that I hope will inspire you to share your thoughts and maybe explore something new.
If you have a great question that I can ask, please DM me on Twitter. Full credit will be given for all questions that I share that are not my own.
Fun Summer PD Opportunity for Educators - The Easiest Book Club, Ever!
If you know me, you know that I am always exploring new learning opportunities. I get a bit too excited when I find something unique and this PD opportunity has gotten me very excited. I love everything about it!
Rushton Hurley, Participate, and ISTE Affiliate ICE have joined forces to create a new Summer Book Study and it starts today!
The book study is connected to Making Your Teaching Something Special: 50 Simple Ways to Become a Better Teacher (Volume 2) which follows up his first book Making Your Teaching Something Special: 50 Simple Ways to Become a Better Teacher (SomethingSpecialEDU)
Rushton Hurley, Participate, and ISTE Affiliate ICE have joined forces to create a new Summer Book Study and it starts today!
 which follows up his first book Making Your Teaching Something Special: 50 Simple Ways to Become a Better Teacher (SomethingSpecialEDU)
Here are the details from Rushton's post.
Starting in mid-July, join colleagues who will take a few minutes each week to join the easiest book study ever. It's an opportunity to find little things that will make you better and connect with others committed to being the best teachers they can be.Want to get started today? Join the ICE Portal to connect with other educators and access the discussion topics each week. You can also visit this page where links to collections, discussions and more will be added each week!
Rather than being asked to read dozens or hundreds of pages, each week choose from a set of very short chapters in Making Your Teaching Something Special. Look at ways to improve rapport with students, how to approach assignments and assessments, delivery of instruction, collegiality and professionalism, and the logistics of making great learning happen for all students.
An idea or a technique will spark discussions with others, allowing you to explore that part of you that is at its best when teaching. It won't take a lot of money, or even a lot of time, but it will require taking part to see what can make you better as a teacher.
It'll be the little things that inspire you. We ask that you explore, share, improve and be inspired.
New Premium Option for ClassHook's Popular TV and Movie Clips
Image Created with Adobe Spark
A few months ago I discovered and began to explore ClassHook for the first time. I was quickly hooked!
The ClassHook Site has collections of clips from popular television shows and movies. The videos are organized by subject and topic. The site also has great pedagogical resources with ideas and resources connected using video in the classroom. You will need to signup before exploring the site directly, but it is free to signup.
ClassHook is still free, but they recently announced a Premium option that I think is worth exploring. You can still use Classhook for free, but there are some nice advantages to ClassHook Premium.
- Premium users can filter clips by Decade and Standards in a search.
- There is a new option to browse clips by standard alignments.
- Premium users can now discover playlists created by other educators.
- Premium users can invite other educators to collaborate on playlists. (The collaborators do not need to upgrade to Premium to collaborate.)
- While all clips have subtitles, premium users have the ability to request that a human perfects the subtitles on up to 15 clips a year.
- Premium users get priority support when requesting new clips.
Learn more about ClassHook and Explore Some of their clips on the ClassHook YouTube Channel.
5 Ways to Insert Images and Icons in Google Docs, Drawings, and Google Slides
Did you know there are several different ways you can insert images in a Google Docs, Google Slides, and Google Drawings without ever leaving the page you are on?
1. Use the Insert Menu in Docs, Slides & Drawings
The Insert Menu allows you to pull images from a variety of resources, including:
- Upload images from the computer.
- Search the web and insert images.
- Insert images from Drive
- Insert images from Google Photos
- Insert images By URL
- Insert images directly from your Camera
Learn more about inserting images on this Google Help Page.
2. Use the Explore Tool in Docs and Slides
The explore button is in the bottom right corner of a Google Doc or Google Slide.
- Click on the explore button.
- Enter a search term, search, and then click on images.
- You can then drag the image directly into the doc.
Matt Miller has a great post about using the explore post with students.
3. Use an Add-on like Unsplash Photos
Insert beautiful, free to use high-resolution images into any Slides presentation easily. The Unsplash Images Add-on works in Google Slides. Unsplash is the world’s premier community for HD photography. And the entire Unsplash library of curated high-resolution photos is now freely available directly in Google Slides for your presentations.
4. Use the Keep Notepad in Docs, Slides & Drawings
If you have images or icons that you like to use regularly, The Google Keep Notepad is a great tool.
5. Looking for Icons?
One of my favorite Google Docs Add-ons is the Noun Project. Add icons without leaving your workflow No need to download—just insert icons right from Slides or Docs, perfect for your next project.
- You'll need to create some image notes in Google Keep. If you've never done this before, this page will help.
- I recommend pinning the image notes in Google Keep to make them easier to find. The Keep Notepad is also searchable.
- You can open up the Keep Notepad in the Tools menu. Learn more about Keep Notepad here.
- Images or text can be dragged directly from Keep Notepad into your document.
One of my favorite Google Docs Add-ons is the Noun Project. Add icons without leaving your workflow No need to download—just insert icons right from Slides or Docs, perfect for your next project.
- Photos for Class
- Flaticon
- Pics4Learning
- pixabay
- Canva - Guide to Sites to find beautify and useful free icons
July Book of the Month - More Now: A Message from the Future for the Educators of Today
The best educators are not content to do the same old thing year after year. Innovative educators push their thinking by engaging in social media, exploring blogs, attending conferences, and exploring the newest generation of educational books.
We've created a site to organize and share some great books connected to teaching and learning. Each month we will feature a new book from our PLN. Have an idea for our next book of the month? Please share in the comments below.Service Learning and Empathy Resources

I recently had the opportunity to complete an Empathy and Service-Learning Course through EdTechTeam Online. I am sharing this post to reflect on the experience and share the classroom resources we created. Hopefully, there is something here that you can use.
Course Objective: Service learning is a form of experiential education in which students engage in, and reflect on, activities that address human and community needs. Many teachers integrate new technologies into instruction with the goal of making the learning more meaningful, motivating, and rooted in the personal interests of students as we develop empathetic and action-oriented students.
We also organized these resources connected to Service Learning and Empathy. Feel free to modify/use anything you might find helpful.

Recommended Books Connected to Empathy and Service Learning
- Be a Changemaker: How to Start Something That Matters
- Changemakers: 10 International Children's Peace Prize winners tell their remarkable stories
- End Peer Cruelty, Build Empathy: The Proven 6Rs of Bullying Prevention That Create Inclusive, Safe, and Caring Schools
- Confident Parents, Confident Kids: How to Use Emotional Intelligence to Manage Your Own Big Feelings While Teaching Your Kids to Manage Theirs
- The Empathy Effect: Seven Neuroscience-Based Keys for Transforming the Way We Live, Love, Work, and Connect Across Differences
- I Am Human: A Book of Empathy
We also organized these resources connected to Service Learning and Empathy. Feel free to modify/use anything you might find helpful.
My Reflections
- While I’ve always believed that empathy and service learning are important, I’ve never put much thought into the how and the what we do as a school to support concepts and activities connected to empathy and service learning. I’ve learned a great deal about what my school and other schools are doing through our research and discussions. We are doing great things, but I think we could be doing more to support our students and communities.
- I plan to start next year by building an organized collection of what we are doing across our building. I hope to encourage educators and students to share how they serve. I will also share our Empathy and Service Learning HyperDoc with our Instructional Leadership Team. I hope that it can be incorporated into our Freshman Advisory Program
- Engaging students in different perspectives has always when an important part of teaching environmental science. We always talk about perspective and recognizing that everyone has different worldviews as we explore environmental issues. We also share several environmental service opportunities as optional enrichment for our students.
- I have never organized a year-long empathy or service learning plan. I’ve realized that I am not doing enough for my students connected to empathy and service learning. I plan to incorporate our activity and a year-long service project into our curriculum next year. I also plan to incorporate more empathy videos into our Friday classroom video series.
Feel free to share your thoughts in the comments below?
Curiosity Question of the Week - What is Your Favorite Movie of all time? Why?
Last week's question had some great responses.
This week's questions is another great question to help you get to know someone. I believe that movies can be a great way for people to make connections and share a bit about what makes you who you are.
Please share your answer and your why in the comments below or using the Hashtag #CuriosityQs. Each Thursday, I will share a new question that I hope will inspire you to share your thoughts and maybe explore something new.
If you have a great question that I can ask, please DM me on Twitter. Full credit will be given for all questions that I share that are not my own.
What is the 1 thing that you love the most about teaching & learning? Why?
This week's questions is another great question to help you get to know someone. I believe that movies can be a great way for people to make connections and share a bit about what makes you who you are.
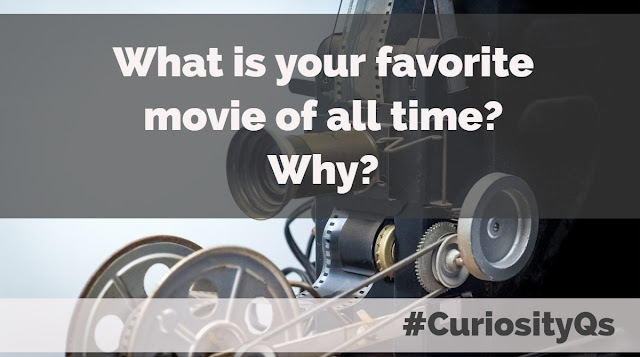
What is your favorite movie of all time? Why?
(You can pick more than one if you have different reasons for loving them. I don't think that the movie matters as much as why you choose it.)
Please share your answer and your why in the comments below or using the Hashtag #CuriosityQs. Each Thursday, I will share a new question that I hope will inspire you to share your thoughts and maybe explore something new.
If you have a great question that I can ask, please DM me on Twitter. Full credit will be given for all questions that I share that are not my own.

Tuesday Tips - Table Borders in Google Docs
Last week I shared a tip about Customized Titles and Headings in Google Docs.
Images can be inserted directly into Google Docs, but your ability to place them exactly where you want them in the document can sometimes be frustrating.
 Tables can be a great way to arrange text and images in a Google Doc.

Sometimes you might not want the borders that come with inserting a table. The table is still in the next image, the borders are just not visible.

Here's how it is done
1. Click on the section of the table you want to change. You can also highlight multiple cells or the whole table if you want to remove all borders.
2. A small drop-down arrow will appear. If you click on it you can choose which borders you want to change.
Images can be inserted directly into Google Docs, but your ability to place them exactly where you want them in the document can sometimes be frustrating.


Sometimes you might not want the borders that come with inserting a table. The table is still in the next image, the borders are just not visible.

Here's how it is done
2. A small drop-down arrow will appear. If you click on it you can choose which borders you want to change.
3. Scrolling over the small boxes will tell you what each one does.
4. When you click on one of the border options you will see that the cells you've chosen will now have highlighted borders and a new table border menu will appear.

5. You can then use the dropdowns in this new menu to set the border to white or to 0pt and the border is no longer visible. There are also other border options you can set in this menu.
I think you can learn more about this one by doing, so I recommend creating a Google Doc and experimenting.
Let me know if you have any questions?
Next week I will share a bit about editing images in Google Docs.
4. When you click on one of the border options you will see that the cells you've chosen will now have highlighted borders and a new table border menu will appear.

5. You can then use the dropdowns in this new menu to set the border to white or to 0pt and the border is no longer visible. There are also other border options you can set in this menu.
I think you can learn more about this one by doing, so I recommend creating a Google Doc and experimenting.
Let me know if you have any questions?
Next week I will share a bit about editing images in Google Docs.
Google's Applied Digital Skills - Reflections on Our First Attempts at Learning
“If you never try, you’ll never know!”
Taking risks with students can be hard, but I believe the reward almost always outweighs the risk. We do fail sometimes, but when we do, it is still a learning experience. Fail forward, right? I am always curious if there is a better way, so I am always looking for new activities and exploring new resources with my students. I believe true growth only comes with change.
One of my favorite times of the year to try something new is when the school year is coming to an end. I love this time because I know my students and they know me. I know what they do well and where they need to grow. Don’t get me wrong, this can be a double-edged sword when considering student motivation. My high school seniors need some extra inspiration to stay engaged this time of year, so when something goes well you know you have something good. With all this in mind, I decided to try something new and explore Google’s Applied Digital Skills curriculum in my classroom.
Getting Started with Google’s Applied Digital Skills
I was inspired a few weeks ago by EdTechTeam’s #GrowWithGoogle Challenges to try something new and explore Google’s Applied Digital Skills with my students. We have engaged in two of the units:
- Pollution Adventure Stories with Google’s “If-Then Adventure Stories” Unit
- Health and Risks Activity with Google’s “All About a Topic” Unit
I chose these two activities because my students already have some experience with Google Slides. I wanted student perspectives on the videos for each activity. I also wanted to explore two different activities that are connected to the same primary resource. We used Google Docs as a framework to connect our content objectives to the skills videos and instructions.
Learning Takeaways
We enjoyed the learning process for both activities. Students were engaged collaboratively and did a fantastic job connecting our content to the applied digital skills objectives. Here are my thoughts connected to the two activities:
- Students shared and engaged verbally and digitally. The students shared their final products in two Padlets. Some of the completed projects were awesome! (If Then Pollution Stories and Health and Risks Presentations)
- Our Quizlet Live and Quizizz Formative Assessments showed that most students built essential understandings connected to our objectives. (We did not do a summative for this unit.)
- Students loved the collaborative elements and opportunities to do something different with slides in the Pollution Adventure Activity. You can hear from them directly in this FlipGrid. You know you have something meaningful when multiple students talked about having fun with the stories. They were not as excited by the more traditional presentations in the Health and Risk activity.
- Even seniors struggle to follow directions and missed a few key components and suggestions during the activity. More check-ins for understanding need to happen next time we do this.
- Students liked the applied digital skills interface, but many felt that the videos were a bit too basic for their skill level.
- The progress data in the classroom learner section is a great tool for the teacher.
- The “Lesson Plans” and “Rubric” for each unit are great resources for getting started and assessing the activities.
- The “Extensions” for each unit are great for advanced learners or students who finish earlier than the majority of the class.
Future Considerations
I will definitely explore more ways to use the Applied Digital Skills Curriculum as part of my class next year. We also plan to explore one or more of the “College and Continuing Education Activities” as part of our year-end activities. The Google Doc served as a good foundation. In the future, I will probably experiment with HyperDocs and Google Classroom as frameworks for these activities.
Final Thoughts
I am always looking for ways to blend essential digital skills into my classroom. Sometimes I stumbled on something awesome and sometimes it is back to the drawing board. The Applied Digital Skills curriculum is a great resource to efficiently and effectively engage students in content while building essential digital literacy skills. I am looking forward to seeing how the curriculum grows and how I can adapt the activities to support my students. We will continue to Grow With Google and explore new ways of engaging students in the learning process. I believe that the Applied Digital Skills could be connected to some awesome learning experiences in my classroom, but I am still learning how.
“The only real mistake is the one from which we learn nothing.” - Henry Ford
Subscribe to:
Posts (Atom)
Popular Posts
-
How will you recharge this summer, but still find the time to grow as a teacher and learner? We’ve created a list of virtual, self-paced, a...
-
Spring is a great time to learn & explore something new! April 25th, 2023 If you’ve followed my blog over the last several years, you mi...
-
Most teachers love what they do, but sometimes it is nice to feel appreciated. May 7th - May 12th is the official week to appreciate teacher...
-
This started as a wishlist of some of the conference presenters I would love to see featured at an educational conference. I started buil...
-
I have the unique opportunity to teach a class that is about half graduating Seniors. This means I have 4 days to engage my Juniors after my...


.png)