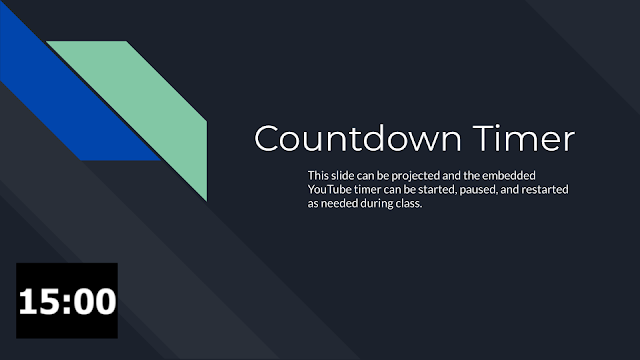
A few years ago, someone showed me how to embed a timer in a Google Slide presentation. This has become a staple in my classroom. I now embed a YouTube Video in the corner of the objective slide or with instructions for student centered work when I know that I want a visible countdown. There are several huge advantages that go along with helping me keep track of the time.
- Students like to know when an activity should be finished. This helps them stay on pace.
- Students who often finish early have a tendency to continue working/exploring when the timer is on the screen.
- If a student is absent and I share the slide deck with them, they have an idea how long they should explore different activities and concepts.
Here is a quick overview of process to set up a timer in a deck. This document also has additional details.
- Create a slide presentation or open an existing presentation.
- Add or update your content.
- Choose the slide that will display the timer. (Typically for me, this is my objectives or instructions for the activity.)
- Open the "Insert Menu" and click on Video.
- If you have preselected a YouTube countdown timer, you can paste the url. I typically just use the search feature and search for a countdown timer with the length of time to find one that works.
- Highlight the one you want and click "Select". Some of these will have animations and sound. You can choose to turn off the sound in the video settings once it is inserted in the slide deck.
- Resize the YouTube video and drag to an open location on the slide and you are ready to go.
- When you want to start the timer, just start the presentation and click on the play button in presentation when you reach the slide with the timer.
You can put in any length of a timer and then drag it to the start time you desire if you are using different countdowns during a class. Click here to explore a few sample timer slides.
If you are looking for more details, this document has additional details and links to some sample agenda slides with countdown timers.
If you are looking for additional options for timers and clocks, please explore this post.


.png)

Such a great tip to share with teachers and presenters! Thanks for sharing.
ReplyDeleteI love simple tips like this. I have transitioned all of my daily agendas to gSlides so this is perfect. Maybe I can get the students to make some timers for me with their favorite music.
ReplyDeleteThanks for this I am always going over time as my classroom clock does not always work.
ReplyDelete
ReplyDeleteHey
Thank you for this amazing article!
I am looking for a long time. I have benefited a lot from reading this article, I want more post about that.
Thanks again for this useful guide.On this blog
Thank you so much for sharing.
ReplyDelete